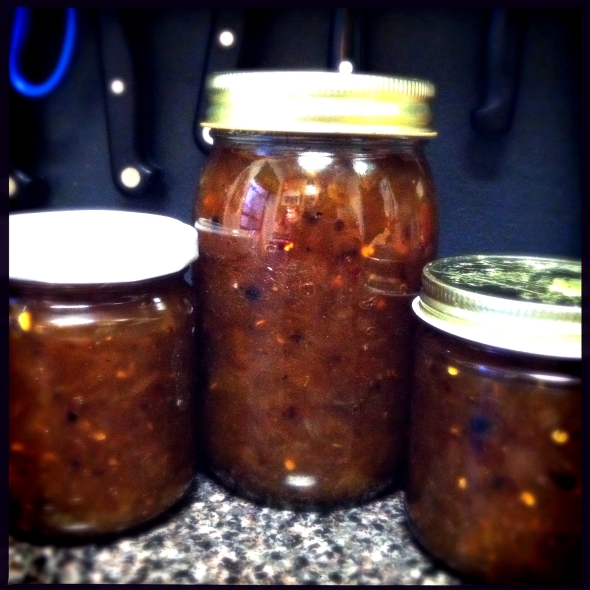
Apple Onion Spicy Chutney
Posted: October 10, 2012 Filed under: Canning, Recipe, Tina Wrote It | Tags: apples, Canning, chutney, easy 5 CommentsI just googled “what is the difference between a jam and a chutney” because I wasn’t sure whether to call this recipe a chutney or a jam. Turns out, a chutney incorporates sweet, spicy and sour elements and isn’t as smooth as a jam. So, this IS a recipe for chutney!
Another recipe created out of necessity to get rid of all of the apples from apple picking. This might be the new hit after Tomato Jam.
It’s spicy, sour and a bit sweet from the apples and caramelized onions. Perfect with grilled cheese sandwiches, in a tart, slathered on eggs, brushed on tofu, plopped into soup….you get the idea.
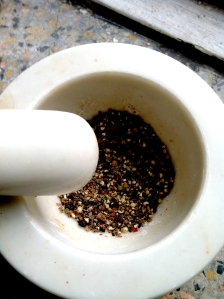
After taking a sauce class with Peter Berley, I’ve really been into grinding my spices right before using them in a recipe. I used our trusty mortar and pestle, but am a big fan of using an out-of-commissioned coffee grinder for large quantities.
Apple Onion Spicy Chutney
Adapted from this recipe.
Ingredients:
- 8 onions, chopped finely
- 4-5 apples, peeled and diced
- 4 cloves garlic, peeled and minced
- 2 cups white vinegar
- 1/2 cup cider vinegar (you could probably use all cider, I just didn’t have enough)
- 2 cups sugar
- 1/2 cup brown sugar
- 3 bay leaves
- 2 teaspoons crushed peppercorns
- 1 teaspoon crushed cloves
- 1 teaspoon crushed allspice
- 1/2 tablespoon crushed red pepper
- 1/2 tablespoon salt
To Do:
- Heat up a bit of olive oil in a large pot and add the onions. Let them cook until softened, about 10-15 minutes.
- Add the rest of the ingredients, stir and bring to a boil. Stir for about 5 minutes and then reduce heat to a simmer.
- Cover pot and walk away. Come back and give it a stir every 15 minutes or so. You want everything to become a lovely brown color and cook down – it can take a while.
- Taste it. Do you like it? Add more spices if you want. Once you can run a spoon through the mixture and a path forms without liquid filling it up, you’ve got the right consistency.
- Pour into jars and can – process in a hot water bath for 15 minutes. You could also pour into jars and put them in the fridge. They should last for a while because of all of the sugar and acid.
Very Lazy Fall Apple Butter
Posted: October 7, 2012 Filed under: Canning, Recipe, Tina Wrote It | Tags: apples, Canning, fall 2 CommentsI love apples. I try to eat one a day, if not more. Last weekend, we went up to Stuart’s Farm for a friend’s apple picking birthday party (genius!). After gathering about 50 pounds of apples with friends and consuming an amazing amount of cider donuts, we came home with 18.5 pounds of apples. What to do? First up, Lazy Apple Butter, which used to be featured on my first food blog “Combustication” and is up on the web no longer. This blast from the past was made by peeling, coring and chopping enough apples to completely fill a crockpot, adding about 1 cup sugar, 1/2 cup brown sugar, a pinch of salt and a freshly ground teaspoon of cloves and a cinnamon stick. Add more or less sugar to your liking and let the crockpot do its thing for about 8 hours on low. If the apple butter is not dark enough or is still pretty thin, take off the lid and let it cook down on low for about an hour. Trust your judgement. If it tastes good and sticks to a spoon, can it!
This is pretty much the recipe and canning tips I followed. Came out with 1 half-pint, 4 pints, 1-16 oz jar and some left over! Holiday presents here we come!
Watermelon Rind Pickles
Posted: September 3, 2010 Filed under: Canning, Recipe, Tina Wrote It | Tags: Canning, pickles 5 CommentsSince we got a small sugar baby watermelon from the Coop the other day, I decided not to waste a single bit and attempted to make Watermelon Rind Pickles. I used the recipe from the Joy of Cooking, but made it much smaller.
I have no idea how these will taste!
Watermelon Rind Pickles (adapted from the Joy of Cooking)
Ingredients:
- 20 lbs slightly underripe watermelons with thick, firm rinds
- 7 cups sugar
- 2 cups distilled white vinegar
- 1/2 teaspoon oil of cinnamon (I used a cinnamon stick)
- 1/4 teaspoon oil of cloves (I used a few cloves)
To Do:
- Scrape out all but a thin line of flesh from the watermelon and peel off the outer green skin. Cut the rind into 1″ wide squares and blanch in boiling water until pieces are tender, but slightly crisp at center. Do NOT overcook. Drain and place in a large bowl.
- Combine the sugar, vinegar, cinnamon and cloves in a saucepan and bring to a boil.
- Pour syrup over the rind and let sit overnight in the fridge.
- The next day, drain the syrup into a saucepan and bring to a boil. Repeat step 3.
- On the third day, bring the syrup and rind to a boil. Using a slotted spoon, place the rind into sterilized canning jars and add the syrup, leaving a 1/2″ headspace. Add a star anise or two to the pint jar if you want. Screw on the sterilized lids and rims.
- Repeat until you fill all your jars. Process in a hot water bath for 10 minutes.
Like I said, I haven’t tried these yet, but I had watermelon rind pickles before and they were pretty awesome! How can you go wrong with The Joy? Fingers crossed.


Recent Comments